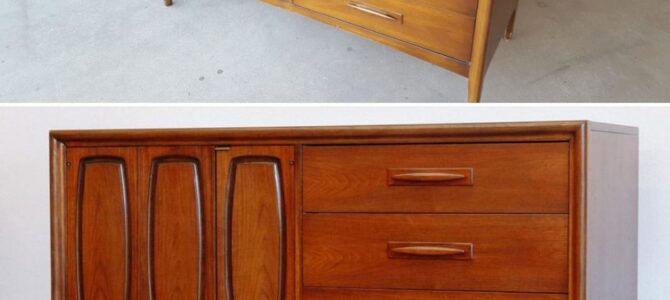
Antique furniture is often worth quite a bit. And it’s important to keep that value intact during repairs.
So when a scratch or water stain gets in the way, try these expert furniture repair tips to help restore and protect your wooden furnishings. And don’t forget to get a quote from your local expert furniture refinisher.
Don’t be hasty
Even if the damage to your wooden furniture is minor, it’s important to be careful not to hastily sand down and damage it further. Trying to remove scratches or disguise water stains by sanding the surface of your table or piece of wood can ruin its character, as well as its texture and finish. Instead, try rubbing the scratch with a furniture wax stick in a color that matches your wood. The wax will help disguise the scratch and protect it from further damage. If the damage is serious, it’s always best to get an expert to take a look at it.
Don’t put the furniture in the sun
When it comes to furniture repair, one of the worst things you can do is put your wooden pieces in the sun. The sun’s rays can damage paint and even cause cracking, especially on bare wood surfaces. This will make it much harder to repair the furniture later on. To avoid this, store your furniture in a shaded area or cover it with a plastic cloth.
Keeping your wood furniture out of the sun is also an excellent way to preserve its color. Sunlight can fade bright colors and darken wood over time, especially lighter varieties like pine and fir. Using a tinted window film can help block UV rays and prevent this kind of damage.
Another important thing to remember when it comes to furniture repair is to use the right tools. Having the correct equipment is crucial, and that includes using glue instead of nails for repairs. Nails will crack the wood, while glue bonds the pieces together without damaging the surface. You should also be careful when sanding the wood and make sure to use a fine-grit sandpaper, which will reduce the risk of scratching the surface.
These tips will help you keep your wooden furniture looking great for years to come, so be sure to take them into account next time you’re working on a project. You can also protect your investment with a wood furniture protection plan, which covers the cost of repairing minor scratches or dents on any of your household furnishings. That way, you don’t have to worry about paying for expensive repairs out of your own pocket.
Don’t use wood filler
Wood filler works well for small dents and gaps but it is not the best option for larger repairs or for surfaces that will be painted or stained. It dries to a hard consistency that is not compatible with the flexibility of wood as it expands and contracts with seasonal changes. This makes it less suited for furniture repair than caulk, which is designed to allow expansion and contraction without breaking.
A better choice is a liquid epoxy that can be applied to wood and plastic. These types of epoxies come in both water-based and solvent-based formulations. The water-based options are usually much less odorous than solvent-based epoxies, and they can be cleaned up with soap and water. They also dry quickly, in about 15 minutes. They are also good for repairing a variety of materials, including metals.
Before you can use any type of furniture repair, it is important to have the right tools. This includes a number of tools for working with wood, such as a putty knife, a hammer, and a screwdriver. You will also need sandpaper in various grits, from moderately rough to fine. It is also helpful to have a piece of cardboard that you can use to protect your work area.
For larger woodworking projects that require a polished look, a mitre box is a great tool to have. This allows you to create a smooth transition between two pieces of wood, which is critical for projects like molding and trim. Wood filler can also be used to fill gaps between pieces of trim.
When using wood filler, it is crucial to make sure that it dries completely before trying to sand it down. This could take up to 24 hours, depending on the size of the hole and the weather conditions. If you attempt to sand the resin before it has fully dried, you will make a mess and clog your sandpaper. If you are unable to wait that long, try wrapping some sandpaper around a wooden dowel and using it as a sander. After the wood filler is smooth, you can paint it with artist’s acrylic colors that are a similar color to your wood.
